Showing posts with label Crafts. Show all posts

July 01, 2013

5 WAYS TO SPICE UP YOUR JOURNAL PAGES

Hey you journal-loving people! Do you ever feel like your journal is a bit plain? I write on a daily basis and I reread my entries every so often. Lately i felt bored by how all the pages looked the same with the same handwriting over and over again. 
Sooo let's do something about it! I came up with five ways to spice up your daily journal. All these options are to be pre-made, so when you sit down at night you go right to writing and just add them whenever you feel like it.

Aren't these little arrows cute? I think they're pretty cool to highlight a passage in your writing or start an entry. As you can see I used paint swatches, so I'd have a gradient ( Ombré Arrows - we're so hipster around here...), cut and glued them together.  There are tons of ways to create these cuties: big to small triangles, light to darker shades... Get creative!


Looove these! No for real, I'm already dreading using them because I want to use them over and over! Might have to make more, woooh! I think the making is rather self-explanatory. Cut cardboard, write on a piece of white paper and glue that on there. I love the color it adds to a page though! So simple, so good!
Tags, tags, tags... I've wanted to buy a pack of these at the craft store forever. Well, how about homemaking them? They're literally a 3-minute project. Cut cardboard, glue a rectangle of paper / other cardboard on there, add the circle on the top and whole-punch it! You might also add some ribbon or lines to write on.
Did you realize there was something wrong until picture three? Haha, there are some things I ALWAYS do wrong at first try. Like mirror-writing. I got everything right ... except the 'a'. Gaaaw! Whatever, this is DIY at it's finest! 
Elsie started this series 'today is (insert adjective)' and I liked it so much, I though it'd be fun to label journal entries that way. The 'Today' an 'was' are seperated in case I just need a 'Today'. Maybe if I wanna say 'Today I won a million Dollars'. It could happen!
Okay so picture-wise this isn't number 5 'cause you've seen the exclamation-mark before. Actually you've seen it in another post before but I felt this needed to be an extra point. I think everyone should have one of these exclamation-mark stamps at hand. Sometimes you just need to make a bold statement. Also a question-mark or a dot would be fun, too, wouldn't it?

I talked about how most of these papercrafts can be used without other craft supplies at hand. Therefore I used a rather simple technique:
How smart is this, please? You can store them away as long as you want and when you crave a color-pop you remove the non-sticky part of the tape and bang: there's your sticker! 
This is what I imagine those tools to be used like. I'm so thrilled to use them overthe next weeks!
Hope you enjoyed today's post just as much as I did! I'm off now to decorate my page about this beautiful sunny day!

Lots of Love, Tabea ♥

June 29, 2013

IT'S PINK - I WANT IT!


Didn't this bookcover just get you within a second? Ohhh how I love my BUST DIY Guide to Life! And because today was such a rainy, gray day (rhyming like no other...) and all I wanted to do was to cuddle up under a blanket, I grabbed this precious little thing to brighten up my afternoon a bit.

I bought the BUST Guide last January as a late Christmas gift to myself after having hovered over it literally every time I'd walk into Barnes & Nobles for weeks. I fell for the book the day I discovered the craft section at the store (reminder: I was there as an exchange student so I didn't know there was such a section at the store). I discovered there was a magazine to this book and so I bought my first BUST issue. It didn't take a day for me get through it and start longing for the book real badly...

BUST is sort of a feminist magazine but not quite so 'Hear me roar, I'm a feminist!' (nothing against that type of (maga)zine). I guess I would describe BUST as an indie magazine for creative girls - and man I've been looking for that for ages! So in the book the BUST team has collected all kinds of DIYs, recipes, tipps on style, sewing and life from former magazines issues.

Okay enough chatting, here's a peek inside!
This' the season to be sewing lalala-la-laaa! Haha, there's some great advise for sewing beginners like me in there. First they explain how a sewing mashine works, simple stitches and stuff. Later on one learns how to reshape sweaters, hem and sew skirts and pants and also how to make fascinators and jewelry! Homemade fashion here we come!

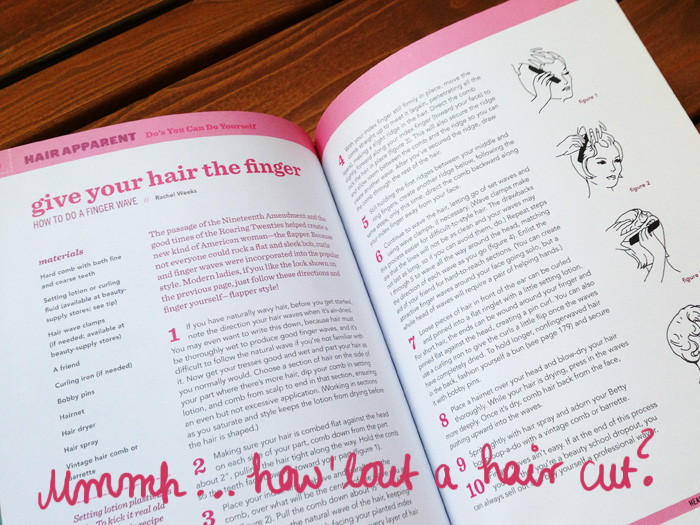
There's a hair and beauty section and I'm especially a fan of these curls, how darling are they? I'm debating on cuting my hair .. mmmh.

In this section you'll also find some snazzy tutorials on how to create the Amy Winehouse Beehive and the Twiggy eye make-up. But since beauty isn't all about hair and make-up you can find tipps on how treat scratches, insect bites and PMS etc. I find that very helpful and it also promotes the whole 'beauty comes from the inside'-thing. Like that!
Talking about the inside ... It's called a Guide to life - so there has to be food! Gooood food! As you can see the recipes look flipping delicious, but you know what? There's even a tutorial on how to make a pinata! Ahu! We love pinatas!

The lower picture is from my favorite part of the book. When I first read it, I just felt so encouraged. Finally there was someone out who'd talk excatly about the things I think about future-wise. Travelling alone and articles related to independent businesses and part-time working ... I was in wonderland!  The chapter is called 'Moving & shaking' and it'll give you all the tools you need to move&shake it as an independent lady! Makes me excited to move out and pursue my goals and dreams!
Lastly - tell me how cute is this? There are lots of cute little doodles all over the book which along with the other photos make it really fun and visual.

Hope I could infect you a bit with the BUST bug - 'cause being a BUST-girl is cooool!
Lots of Love, Tabea

June 25, 2013

FABRIC COVERED PHOTO ALBUM

She's back! Woohoo! The reason why I was gone is rather simple - a lightning bold struck into one of the local aerials which is responsible for our internet. I've never seen lighting that bright and I guess neither did the aerial. So we were cut off the world wide web for a few days - thank god for mobile internet, but a blog post just wasn't possible to upload! 

Well today I'm back and ready to share the progress i made with my photo album. 

So this is how my embroidery project turned out - I love it! The colors are nice and bright and really scream: Summer's here! Looking at the back part of it you can see that I didn't suture the left-over thread. I'm not entirely sure whether this is the best way to do it, but I wanted to avoid any bumps the knots might have caused.

Now we're coming to the main part: How to cover an album with fabric...

You start by mixing equal parts of glue and water and spread that mixture over the front or back of the photo album. Try to get especially the borders and corner and don't use to much of it - you don't want to get your fabric all soaked, do you?

The next step was nicer to show on the middle part where the binding is. You've already put the glue in place and now you'll just flap the fabric over and gently smoothen it out with your hand. Do this until the entire outer part of the album is covered with fabric and watch out for any creases close to the binding part. Glide over them with your fingers so the fabric really sticks to the book in all places - otherwise you'll get ugly air bubbles underneath it.
Okay good job so far! Now we're coming to the tricky part. You cut off all four corners of your fabric so it'll be easier to fold later. You also make a straight cut where the round binding part starts. 
Self-explanatory, isn't it? Haha this photo just screamed for handwriting! It's simple. Put glue onto the edges of the book and fold the fabric over. You might have to fight a bit with the corners depending on how much fabric you have to fold over. My advise: Put glue on those bad boys until they stay in place! You are the boss here!

Lastly...
Covering the binding... This might get a bit violent. I'm kidding! It's all good and easy! Two steps: 1) Put glue onto the fabric flap 2) Bend the book boards to the back and the whole between the cover and the binding thingy wil expand. Now push the fabric flap in there! See the scissors I placed so nicely in the background? I USED THEM FOR THIS! Don't know why I sream when I say this but yeah .. I'll advice you to use anything long and flat like a ruler.

Well I hope you enjoyed this little tutorial - I'm really sorry I don't have more pictures of the album itself ... the light and I were just not having it today.
To make you curious (muhaha!) - here's another picture of me working on the last decorative part of the album. So hope to see you again for more DIY album action!

By the way did you spot my creative way of spelling summer? SUMMME. I'm a pro, I know...

Lots of Love, Tabea ♥

June 11, 2013

DREAM JOURNAL

Whaaaad'up? Uh yeah, I'm finally fit again and ready to get my craft going! Lately I've been having weird dreams .. well my dreams are always weird. But lately I had several weird dreams in a short period of time. Is that a sign? Apocalypse?! Let's hope not ...

The other day I dreamed that I there was a Grizzly bear by my house and my dad chased it away with some weird rolling pin, another day my friend's car was stolen from outside my house and he was just freaking out, screaming at a truck that had suddenly appeared. And yesterday night, I dreamed that I got to know one of my friend's moms who I'd never met before - and she was mean! Like 'what are you looking at me?' - mean! Why are my dreams so terrible??

Because I love to remember my dreams (no matter how horrible they were), I sometimes write them down. So today I'll show you how to create a dream journal. It'll be the size of about 3x5inches.
You'll need acrylic paint (any color), cardboard, paper (I like to use old paper that I would not use as notebook paper anymore) , brush, needle, embroidery thread, marker, pin

This time, I put the steps right onto the pictures - for all the 'visual'-types out there! I'm with you!

Lastly glue both cardboard pieces onto the booklet. Done!
This is sooo cute! Can't wait to fill it with the things my nightly imagination comes up with!
For everyone interested in more 'dream-journal'-inspiration - here's my old one. I think the cover is pretty rad. It's Tavi Gevinson glued to the face of Jonny Depp. I made this one in a late-night session - Probably thought this was hilariously funny at the time. Okay, I still love it.  Also some of the pages I created in it - just plain lines would have been boooring!

Okay, have a great night / day (depending on when read this) everyone and remember to write down all the funny things that happen while you're awake or asleep. Rereading them later is a treasure!

Lots of Love, Tabea ♥

May 26, 2013

ROCK THAT NECKLACE

Owning a collection of some sort is cool. Like Spongebob's-hidden-library-cool! Man I love episodes where they show how smart that sponge actually is.. It's just a thing when somebody owns like a hundreds porcellaine cows or 500 blue stamps or a hidden library with thousands of books. The last one is especially cool if you're a sponge.

There's something about that determination people have when it comes to hunting down pieces to add to their treasures. I used to collect rocks and gemstones. It was quite a tradition I had together with my mom. Whenever we'd go places, we'd try to find some new rad-looking rocks. Over time we collected quite a few of them...

Dang! There are probably lots of people owning like ten times as many but for me - this is a heck lot of rocks! Since I don't have nice way to display them in my room I stored them away for some time. The other day though, I saw this cute tutorial on how to make a necklace using those gems. So yeah I'm not claiming this idea to be mine and should I ever find my way back to that blog I'll for sure post the link. I'm terrible at bookmarking things like this... 

Well it wasn't my idea, but I'm gonna show you how I created my necklace anyway! To make this fancy-looking rock-necklace you'll need:
I used thin golden wire, some left-over chain, bits to hold the whole thing together and obviously - rocks. I wanted my necklace to be kinda ombré - because I'm a hispter like that. Haha. No, I just liked the texture of these rocks and they happened to be matching colors. 


To start with, you should tie a knot around the rock. Find a good place for it to stay on there. Some sides of the rock are probably better than others, for it to not slip off again. And then wrap, wrap, wrap, wrap! The dea is simple - making it real a whole other thing. I'm telling you, some of these things were beasts not willing to wear a golden wire dress... Here's my advise: Do a lot of knotting. Go under wire parts that have already been wrapped, with the end of the wire and try to make it a real tied net, not just a spiral wrapped around it tiedly. Oh yeah and don't pull too tight, this wire can't handle strong girls apparently. 


And here my focus failed me - it's okay iPhone someday you'll, too, be able to shot macro photos like a Canon 7D. I'm actually sure about that. Anyway, once you wrapped the rock so it won't fall out of its new golden net, you put a ring on the top part and twist it around a few times so it stays on there. 

Now connect that trinket to the chain. You can either use the same or one more ring for that. I used the same one. Also I added the chain lock to the ends of my chian piece and tadaaa, necklace version number one - done!
But loving precious looking things - I wanted more! So I went and fought the battle of wrapping rocks. I'm telling you, the smoother the rock's surface, the more of a pain it is to wrap. It took me some time to figure out the right technique but after all I couldn't let a piece of compressed sand and dirt (isn't that what rock are made of??) triumph over me. Never! And because I'm a fighter like that, after about an hour this is what my final result looked like.

It's a bit heavy but I'm thrilled to pair this with a cute summer dress or a blouse! 
Okay, now I'm off to bed to rock another week of school! Pun intended!
Lots of Love, Tabea ♥ 

May 15, 2013

SECOND LIFE: BOX MAKE-OVER


Hey Friends! Today I'm back with a quick make-over I gave to those really old wooden boxes that have been around pretty much since I got my first own room when I was like .. a toddler maybe? I'm not kidding you, I literally had these all my life. But since my room is pretty colorful anyway these days and so were those boxes, I decided it was time to make them look a bit more matchy-matchy. 

So this is what they looked like beforehand. I know the picture is pretty brilliant - I should become a professional item-photographer (Oh yeah great english language right there!). Let's just call it an action shot. This project was one of spontaneous ones, started at like 6 pm. Yes, I go to bed early so this is pretty late for me - don't judge! So ya, I was kinda fixed on the outcome and didn't bother much with taking before-pictures - Sorry for that.


Because I didn't want my solution to be permanent I used plain white wall paper. I cut up a piece that would be long enough to wrap around the box. Then I cut this piece horizontally in half again because my roll of wall paper was actually wide enough to make up for two boxes. It adhered it with good ol' shipping tape and folded the remaining wall paper to the inside and used more tape to make it stick. Since this is probably not the best description - look at the pictures guys! 


Yupp that is how I did it. I didn't worry about the fact that you can still see the actual color of the box on the inside. I pack them full with stuff and put them on my shelf so nothing of that will be seen later. I'm clearly a rebel. 

But since just plain white boxes would be even more boring than colored ones they needed some more decoration to them. I had just recently put together a journal page using baking paper, so I still had some lying around as well as my newly bought washi tape...

So I created big labels for all four boxes. Each of them using a synonym for 'things' because I constantely change up the things I keep in these bad boys. I couldn't find a black marker anywhere around the house, so I just used black paint to write the words on the baking paper. I give you one tip - make sure the paint is completely dry before you go anywhere near your new white boxes with the labels, otherwise yeah .. stains.. 

Once I made sure everything was dry and set, I started taping the labels to the boxes. With a heck lot of glue - washi tape is crappiest tape when it comes to actually holding something together, don't even try using it by itself. You'll definitely need a glue stick and some normal tape to make the whole thing stay in place for longer than 10 minutes.


I have been thinking about giving these oldies a make-over for quite some time and I have to say - I'm very pleased with the outcome of this little project. Now organising and reorganising will be even more fun! Yikes!

Until next time, 
Lots of Love, Tabea ♥